- You are here:
- Home »
- Bike Accessories
Category Archives for Advice

Mountain Bike Handlebars Reviews and Recommendations
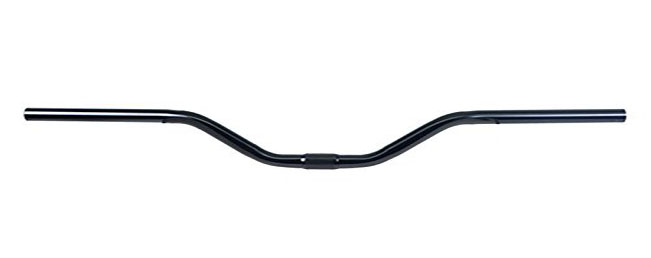
Getting the best handlebars for your mountain bike (MTB) is essential if you want to get a good ride. They’re a crucial part of controlling your bike and they have a significant impact on how your bike handles—essential when you’re dealing with all terrain surfaces.
Things to consider when shopping for the right MTB handlebars include the seat position, the width, the brake levers and hand position, whether you want backsweep, and the style itself like flat bars, riser bars, and drop handlebars. In most cases, you’ll be able to choose between titanium, aluminum, or carbon. Many pros consider carbon the best of the three because they are so lightweight, but you can get quality handlebars in any of these metals. They all have pros and cons, so you need to decide what’s important to you and go from there.
A few things about handlebar geometry you’ll want to consider:
The rise, which is the height differential between the center of the bar at the stem the center jut after the taper and the transitional bend, are often 0 or flat in MTBs. High rise bars are usually around 40 mm to 50 mm, which is two inches or less. Getting the rise right is usually based on your position when on the bike. Taller riders might feel like the flat rise is too low. Bikes for riding downhill also tend to have a slightly higher rise because it allows for more control. In general, riders just prefer what makes them comfortable, so there’s no right or wrong rise. Try out a few variations and see what makes you most comfortable.
Next, you’ll want to think about sweep. Upsweep is the vertical angle of the bars at the grip and affects the overall rise of the bars. It’s a separate measurement than rise, though. It really doesn’t have an effect on performance, aside from affecting how comfortable you are when riding. Most of the time it’s between four and six degrees.
Backsweep, the other type of sweep, is the angle at which the bars swoop toward the back of the bike. It can range from zero degrees to 45 degrees in specialty bars. Like upsweep, it’s all about comfort and has no bearing on a bike’s performance.
Next up is bar diameter. Mountain bikes are only available in one width at the grip, which is 22.2 mm. However, at the clamp, there are three diameters from which to choose, including 25.4 mm, 31.8 mm, and 35 mm. The clap diameter is the middle where the bar is clamped to the stem and larger clamp areas tend to be stronger and provide an increased surface area with the stem. The main thing you’ll want to know is that if you’re replacing your bars only, you’ll need to be sure what you buy matches your existing stem clamp diameter.
Width of Mountain Bike Bars
Now we’ll talk about the width of handlebars, which is arguably the most important consideration. The common belief is that wider handlebars are better. We tend to agree, at least, when it comes to modern riding and the need for steering control. It also makes your body mechanics better because the wider your arm and chest span with wider bars the easier it is for you to breathe properly when riding.
It’s possible to get handlebars ranging in width from 600 mm to 840 mm. Keep in mind that, despite the belief that wider is better, you still need to go with what makes you feel comfortable and secure. Also, remember it’s always possible to cut down wider bars. If you’re torn, invest in the wider option that you can try out for a while and cut down if necessary in the future.
Metal
Finally, before we get to our recommendations for best MTB handlebars, we’ll take a look at the various metals used to make bars.
Aluminum bars tend to be the cost-conscious option. There are plenty of great aluminum options available, but they are the heaviest, so you’ll need to keep that in mind.
Titanium bars are the most expensive and still have the heaviest weight. They tend to give the harshest ride when it comes to vibration and impact.
Carbon bars, which are quickly becoming the favorite of many, are forgiving and lightweight. Some riders prefer the other options because they believe carbon isn’t as strong, but, in most cases, carbon bars are fine as long as they are made by a reputable manufacturer.
MTB Handlebar Recommendations
Now for our favorites:
LIBRA Sports LHB001C Carbon Fiber Flat Handlebar for Mountain Bike or Road Bike - 31.8 mm Diameter

This is a full carbon bar that’s ultralight at 145 g. It features a 720 mm length and 31.8 mm mounting diameter. We love its unique textured no-slip center section, as well as its UD matte finish with ghost black LIBRA Sports logo. This bar retails for around $50, so it’s a very economical choice.
Crank Brothers Iodine 11

This is also a carbon set of bars, making it super lightweight and flexible. They measure 30.7 inches wide with a 30 mm rise. They also have a nine-degree sweep and five-degree rise. These handlebars are perfect for all-mountain riding and feature a textured area on the stem for zero slippage. Its brilliant, low profile graphics look good and help make the bar a winner. These handlebars retail for around $120.
Spank Spike 777 FR Bearclaw Vibrocore Bicycle Handlebar

These handlebars are lightweight at 310 g and feature a 31.8 mm diameter. They have a shot peen-anodized finish with polish accents and decal logos and feature
Dual XGT, CNC Bending, Impact Ends, and MGR technologies. These handlebars retail between $90 and $100.
Race Face Atlas Riser FR

Another set of aluminum bars, these are 31 inches wide and have a 13 mm rise. There’s an eight-degree sweep and four-degree rise and they retail for around $75.
Renthal Fatbar

These handlebars are available in multiple configurations and come in carbon or aluminum. They consistently rank high among experienced riders. There’s also a light version that is also a couple of inches shorter in width.
Best Bike Racks: Things to Consider
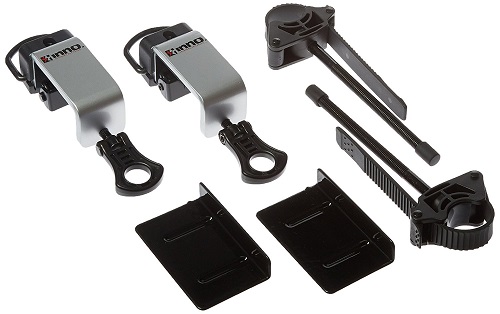
Buying a bike rack can be difficult. There are a lot of options when it comes to what kind of rack you choose, depending on what type of vehicle you own, what type of bicycle you’ve got, and how often you’ll be using it. We love bike racks that are sturdy (ie they won’t fall off), won’t damage our vehicles, lock (so that our bikes aren’t stolen, like our friend’s was at a cover band for the Grateful Dead), and are simple to affix the bikes to. If you're involved in a triathlon, you may need a specific triathlon bike rack. We also like a good affordable rack, though some of us who will be using them a lot and who have heavy mountain bikes prefer to pay top dollar for something that will last. Another consideration is how far you’ll be traveling with your bike. If you’re on a cross-country road trip, you might want a sturdier option than if someone simply drives an hour out of town to bike a few trails on the weekend. We’ve invested in a few awful bike racks over time, and we want to make sure you don’t do the same.
When you’re starting to think about making the commitment and finally purchasing that rack you’ve been eyeing for months now, we recommend you do some research online first. If you’re reading this, you’re likely already on the right path. We also advise you go into your neighborhood bike shop so that you can look at a few bike racks in person and develop a relationship with the shop. Even if you do decide to purchase the rack online, it never hurts to talk to someone face-to-face, and you can always stock up on your gels and other accessories in the store, or purchase a few maps of the local biking trails. There are also often great community bike rides as well as bike tuning clinics, where they teach you everything you need to know about that wheeled thing you’ve been cruising around on. Or, perhaps you already know all the trails and how to keep your bike in top shape, and you just want to meet a few new friends to tackle all the gnarliest trails within a five-hour radius. Either way, it’s good to support a local business and to make an in-person connection for bike gear. For big purchases, online, is often the most convenient way to get the best deal and to make sure you’re getting the exact model you want.
Here are a few different options:
1. The Durability
You’ll want a rack that keeps working for years to come. Some cheaper models can be flimsy, or can do some serious damage to your car. Others have straps that tend to break after a year or two, or may end up holding your bike in such a way that it bumps around a lot as you’re driving. Certain bike racks are best for the city, while others are made for being jostled as you drive down those rough roads in search of the most epic trails.
2. The Materials
How sturdy are they? How heavy?
3. The Positioning on Your Car
A roof rack can work well if you want to be able to open your hatch, or if you want to be able to carry the whole crew’s bikes on the roof. A bike storage rack might be exactly what you need. However, some of us (ahem, the short ones), may find it a little tough to always be hauling your bike overhead to place it on the car rack. And if you’re road tripping out of your car from track to track, you might want to consider that you won’t want to remove your bike from your hatch every time you want to open it (though, some of us have been known to remove the rack with the bikes still on it from our cars out of sheer laziness).
4. The Price
Your budget will dictate what kind of bike racks you’ll be comparing. We’d recommend you consider how much you spent on your bike, and that you buy a rack commensurate with this purchase. If you have a bike you’d hate to see destroyed or stolen, it would be well worth your time to shell out a little extra cash to make sure it arrives at your destination safely.
5. The Style
Roof rack, storage rack, car rack, hitch mount, tray style, arm style…there are a few different types to choose from. And who doesn’t want a sweet-looking rack that makes us look like a badass? Some racks look better than others, and so this is an important component of the buying process for some. For others, a cheap, bomber thrift store purchase that’s scratched and has, in a previous life, been spray-painted bright pink, may just do the trick. We don’t judge.
In the end, there’s no specific brand of bike rack that’s best. It all depends on what you’re looking for and how much you’re willing to spend. For the record, though, we’d recommend you spend a little more than you’d planned to make sure that your precious bike stays safe and unharmed. There’s nothing worse than returning to your vehicle after a long night of enjoying a Grateful Dead cover band, as our dear friend did, and seeing an empty, sawed-through rack on his car.
Our picks for the top bike storage bike racks out there are:
1. Saris Bones

2. Inno Velo Gripper

3. The Kuat Trio

In the end, a bike rack changes your life. No more stuffing your bike into your car, or taking the wheel off, or asking that one friend with a truck to drive. Those days are over!
What Size of Bike Stem Should You Have?
Guide to Adjusting Your Bike’s Fit & Stem Sizing
Many bikers experience persistent bodily discomfort as a result of riding with pieces of bike hardware that are incorrectly fit for the size of their body. Many parts of the bike from the handlebars to the head tube, seat height and stem size play a factor in how well fit a bike is for an individual cyclist.
 Here, we provide a guide for bikers to improve their physical alignment while riding, through customizing their bikes adjustable features, as well as to address the question of what size bike stem you should have.
Incorrect Bicycle Size
Warning Signs and Ramifications
All too often, bikers can develop pain in their knees, lower back, neck, feet, and/or hands. No matter if you are a recreational biker or avid cyclist, riding your bike should never cause physical pain or discomfort—especially for those who bike regularly, any of these warning signs are indicative of a discrepancy in the fit of your bike. If left unattended, over time these issues can cause permanent damage to your joints and muscle ligaments.
Adjustable Bike Parts
Most bicycles are designed with several parts that are adjustable for a rider’s individual optimal fit. If the frame size is the wrong fit for your height, any amount of individual adjusting will not do much to help offset the ramifications of your body’s physical compensation for the incorrect fit, so, it is important that you are sure that your bikes frame is correctly sized for you.
For those who are positive that their bike’s frame is the correct size, there are three main adjustable features that will improve the fit of your bicycle.
● Seat Height
Often, the most overlooked attribute of a bicycle’s fit is in the height of the seat. For those who bike irregularly and recreationally, the height of the bike seat can be thought of as irrelevant. Nothing could be further from the truth.
The height of your bike seat determines the amount of leg extension that you have while pedaling. The less leg extension you have, the less power you pedal with. Decreased leg mobility means a decrease in the muscles that are available to assist in pedal strokes. This often results in premature fatigue and physical pain in the front of the knee.
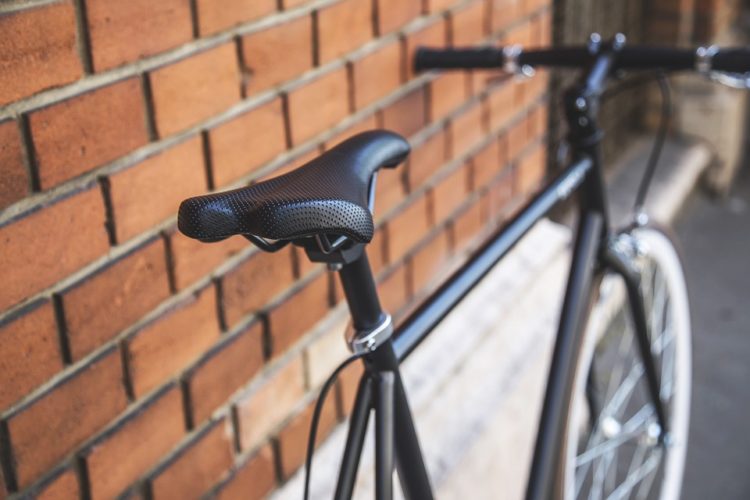 Adjusting your bike’s seat height is the easiest way to improve the quality and ease of your riding. Adjust the height until your leg is nearly straight with your foot on the pedal. When pedaling, your legs should come almost to their full extension on the bottom of the down pedal stroke. That way, you give the optimal amount of muscle engagement to the effort of propelling the bicycle and prevent your knees from becoming cramped.
● Saddle Placement
If you are experiencing lower back pain or upper neck pain as a result of biking, this may be an indicator that you have to stretch your body out too much while riding. If you are sure that the frame is correctly fitted for your body, then you might want to try adjusting the saddle to a more forward position.
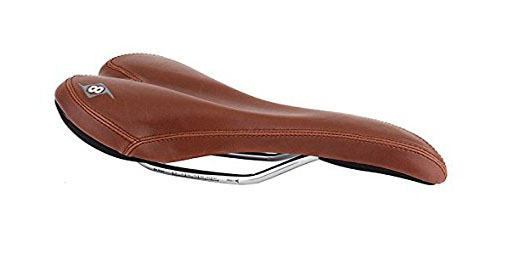 With your hands on the handlebars, your hands should be almost under your elbows, providing structural seated support for your neck and lumbar.
● Handlebar Stem Height
The biggest indicator of a discrepancy in the size of your handlebar’s stem is the occurrence of feeling numb or tingly hands. Stem spacers can help to fix this discrepancy; however, they are often they are overused. Using an excessive amount of stem spacers is dangerous and irresponsible as it disturbs the handling and control of the bike.
Bike Stem Fit
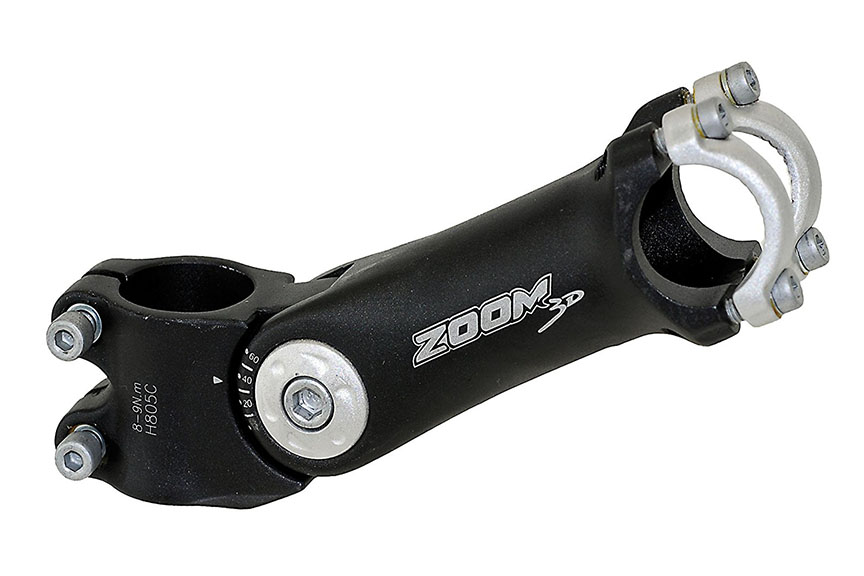
Unlike the saddle stem height and placement adjustability, the handlebar stem is a fixed piece of hardware, which is fit for each bike. Although not adjustable, the handlebar stem is replaceable. The stem is the piece of hardware that connects the handlebars to the bike’s frame, and thus, is fitted specifically for the frame size, type, and design.
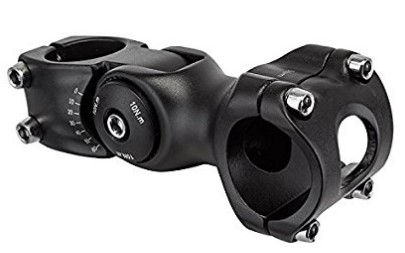 If you are sure that your bike is the correct frame size and it came with its factory parts, almost undoubtedly, the stem is of the correct length. However, if you have an older or previously-owned bicycle with a mismatch of hardware, it will be necessary to ascertain the correct stem size for the fit of your bike.
What Size Bike Stem Should You Have?
The size of stem you should have depends on the bike’s size, as well as your fit to the bike. Some of the common indicators of a sizing discrepancy in your stem include constantly shifting around on the bike and numbness in the elbows, hands, fingers, shoulders, or the upper back.
Bikers should not have a difficult time bending their elbows while pedaling and their hips should be able to remain stationary through pedal strokes. The easiest way to determine whether there is a problem in the size of your stem is to get someone to take a picture of you stop your bike from the side. This will allow you to determine if your alignment is correctly placed while in full stride.
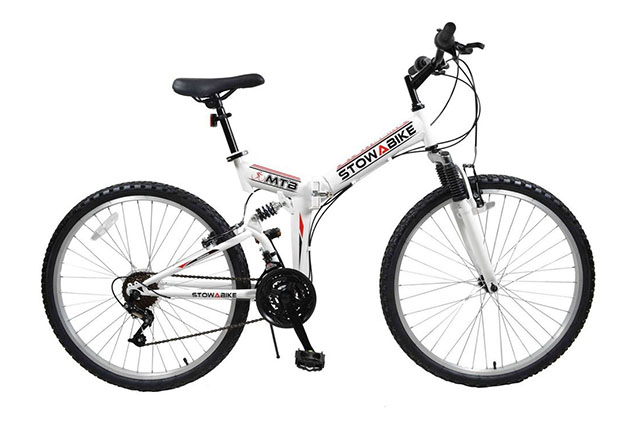 Road bikes and mountain bikes have different stem length requirements and features. For mountain bikers, a long stem will result in slower handling responsiveness and sluggish control. If the stem is too short, the mountain bike will have over-sensitive handling and sporadic control. With mountain bikes, control and handling play a key role in the bikes usefulness on varied terrain.
For road bikes, the stem length is based on the size of the bike frame. Most road bike racers have long stems, ranging from 110-120 millimeters in length, which allows them to stretch out their bodies to become more aerodynamic. Most road bikes have a stem that is on an angle parallel to the ground, which is often set at -17 degrees.
The vast majority of bikes have a mid-range stem size, ranging from 60-80 millimeters in length, providing a balance of handling efficiency and comfortable physical alignment. Advanced mountain bikers often opt for a short stem of about 40 millimeters, allowing for greater off-road handling and downhill momentum. The only way to be sure that you are getting the correct size is to be fitted by a professional, as a few millimeters of difference can have a significant impact on a biker’s body alignment and riding posture.
Why You Should Have an Indoor Bike Stand
Summer is almost here and you know what that means—bike weather! That’s right. It’s time to dust off your set of wheels and take to the streets. Of course, you are prepared to acclimatize your buns to the feel of the saddle and you’re not looking forward to how your legs are going to feel in the morning.
Nevertheless, you are determined to really give it your all this year. However, biking does not have to be a fair weather activity. Many avid bikers continue their conditioning all through the winter months by using an indoor stationary bike stand.
So, before you take the cycle out for its first cruise of the season, only to abandon it once again to the depths of the garage while you ice your sore buns for the next week, consider the reasons why you should have an indoor bike stand.
It all comes down to consistency. Riding for fun is great, but the biggest benefits of biking are experienced when you make a concerted effort to change the way in which you commute.
 Biking on a regular basis improves your cardiovascular health, muscle strength, endurance stamina, and overall feeling of wellbeing—not to mention the substantial financial savings that become immediately evident, regarding gasoline expenditure, vehicle maintenance, and extraneous costs for parking and more. Biking is, by far, the most health and cost efficient way of commuting.
Once you establish a habit of bike commuting, it becomes the part of your day that you look forward to. Your body feels alive and invigorated all through the day and you wake up with the anticipation of an exhilarating commute. There is one catch, however, that becomes one of the biggest deterrents to prospective bike commuters—discomfort.
Consistency is Key
There simply is no substitute for regularity and conditioning. The joy of regular biking is mitigated for those who do not engage in it on an everyday basis. This is because their body never gets into the rhythm of daily physical activity, as well as the soreness that results in the riders physical contact points on the bike. Let’s look at another example, which will illustrate this logic…
No Pain, No Gain
Imagine someone who is taking their first guitar lesson and we can call this person, Jill. Jill is excited to learn how to play guitar and she’s not afraid of hard work and focus, but Jill has never been big on physical discomfort. To Jill’s dismay, one of the first obstacles in studying the guitar is to form calluses on her fingers. Before she does this, it will be very difficult to improve as calluses will form naturally to shield her fingers nerve ending from the acute pressure of the guitar strings.
 Since it hurts her fingers to practice, Jill never gets to actually learn how to play the guitar, because she never got over the physical learning curve. Jill’s teacher gives her a little gizmo to strengthen her hand, which will help to condition the muscles that she will use for playing. After a few weeks of strengthening her hand and finger muscles, she is able to maintain a regular practicing regiment, which results in her fingers becoming calloused and her ability to improve becomes exponentially easier, especially with a stationary bike stand.
There is an exact equivalent for bikers and indoor cycling, in the way in which one’s body acclimates to the pressure points of one’s bike, as well as in the conditioning to be maintained using an indoor bike stand trainer. Even if you can’t take the bike out on the town every day, you can keep up your physical conditioning by using a bicycle trainer stand in the comfort of your own home or at the gym.
Without regularity and consistency, the human body wants to find a natural stasis or neutral mode. This is why enabling your daily routine to accommodate cycle conditioning is essential. By keeping up with your biking, either outdoors or indoors, your body will settle into an active neutral state and will stay in a place of readiness from day to day, instead of losing the progress which you have made with indoor cycling.
Why You Should Have an Indoor Bike Stand
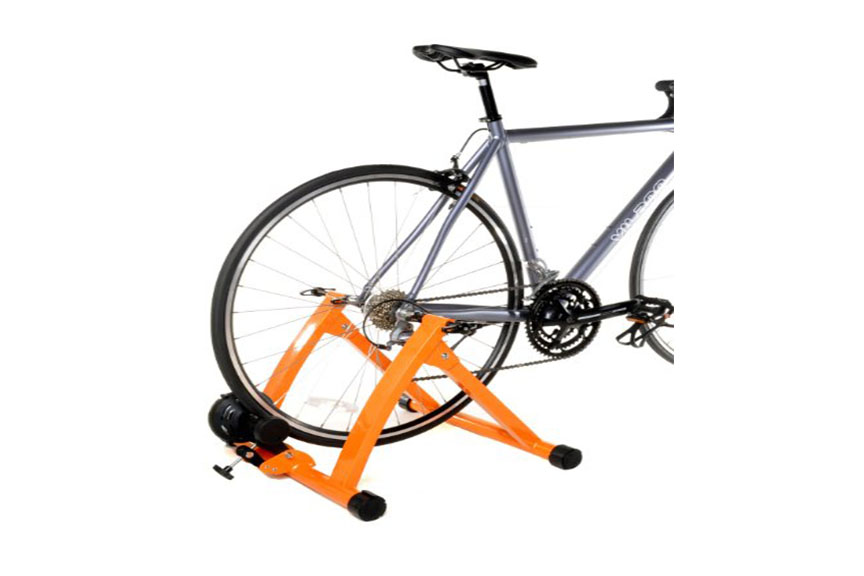
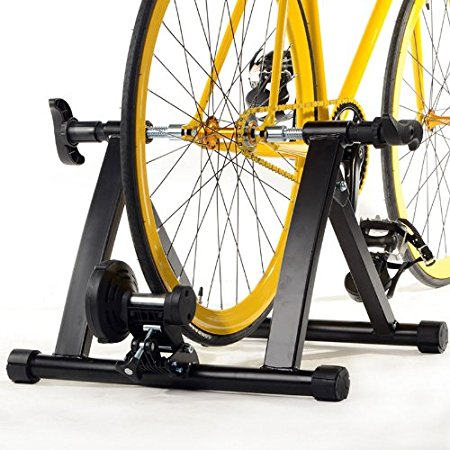 Indoor bike stands, or bicycle trainers, are an essential piece of gear for the serious biker or cardio enthusiast. No matter your daily routine, a bike trainer allows cyclists to use their trainers in their homes, office, school, local gym, or anywhere else that has just enough space to fit their bike.
Bike stand trainers offer many benefits for those looking to improve the quality of their health and biking performance with a concise, convenient method.
Key Benefits
● Maintain a Healthy Routine in Any Weather
No matter which weather has decided to show up, you never have to sacrifice your daily ride due to nature. With an essential bike trainer indoors, bikers are empowered to maintain their physical conditioning without having to purchase extensive amounts of weather specific gear, which can incur ongoing costs to maintain and replace worn out equipment.
An indoor bike trainer is a one-time expense, which can range between $50 and $1500, depending on the features that you require.
● Train on Your Own Wheels
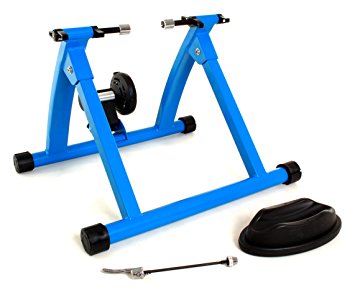 Unlike a stationary spinning machine or other exercise bike often found in herds at your local gym, a bike trainer allows you to use the same bike that you use on the road.
Indoor bike stands will attach either to the back wheel of your bike or the back drive train—without the wheel. This is a huge plus for bikers who use cycling shoes of a clip-on, or clipless design, as it allows you to train with your own gear and equipment.
● Take Your Trainer on the Go
Indoor bike trainer stands usually weigh between 40 to 60 pounds and come in convenient carrying cases. They are designed to be portable and mobile, many models including a wheeled case to transport them. Even the larger roller trainers and exercise bikes are foldable and designed for wheeled transportation.
● Have Fun with Other Riders Abroad
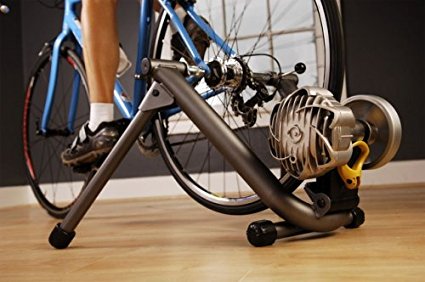 Trainers have seen some great innovations recently with the advent of Smart Turbo Trainers. These indoor bike stands are designed with wireless capabilities and remote controlled operations.
By logging into trainer software, such as Zwift, CycleOps, or TrainerRoad, cyclists can link up with other real people from across the globe, to race on a variety of different courses. The smart technology allows the map to communicate with your trainer, automatically shifting the resistance to correspond with the terrain of your virtual route.
Whether you are a new biker or a veteran, an indoor bike stand trainer will accelerate your rate of improvement and overall health. Why you should have an indoor bike stand, has to do with self-betterment and unlocking your optimum potential as a cyclist. Best of all, no helmet is required.
Feel free to leave comments and questions and thanks for reading!
